Showing posts with label How To. Show all posts

Saturday, February 21, 2015

High Waisted Jean Short Cutoff DIY


Who's ready for another Weekend DIY?! If you saw my last post, you know I went thrifting with Aaron while he was up here last week, and I found the perfect pair of high waisted jeans for $4! I was actually really surprised to find so many pairs of jeans at the thrift store, but these were the only pair that actually fit comfortably and since this was my first time making cut offs, I thought 1 pair would be a good starting point.

The jeans I bought from the thrift store were $4 Faded Glory jeans. The problem I didn't think about when I bought them was the fact that they're stretch jeans. Now, this isn't a HUGE issue, but the end result will be slightly altered. Since they're stretch jeans, the elastic woven into the jeans make it harder to tear up AND once you cut them off, they sort of suck to your legs and roll. BUT like I said, not life altering! In my case, I've been losing so much weight in the past few months, that in a week, they won't suck to my legs! :D


Now then. I did some research before I just took a pair of scissors to these jeans. I wanted to make sure there wasn't some magical PERFECT way to do this before I just went all hackjob on it. But the truth is, there is no perfect way to do this. 

What you'll need:
High waisted jeans from a thrift store
Scissors
Tweezers
Xacto knife
Marker
Grater
Patience. Lots and LOTS of patience (you'll see why)


First off - Put them jeans on!

Wearing the jeans while you measure will ensure that you don't cut them off too short! I mean, we're trying to make some Daisy Dukes here, but we don't want a redneck thong. . . 
NOT WHAT WE WANT!!
When you have the jeans on, take the marker and lightly draw how short you would like your shorts. I kept mine a little longer in the back and shorter in the front. A good rule of thumb that I found when looking for some help on this was to keep at least 2 inches of fabric from the seam in the crotch region. Down the outside seam, I measured about 16 inches.


My marks for measurement (2 inch inseam 16 inch outer-seam)
When you cut the majority of the jeans off, cut a little below your measurements JUST TO BE SAFE! Put the jeans back on and draw the exact lines you'll want to cut for the actual shape of the shorts you're wanting. 
After you've got the measurement you want, take the shorts off and grab the scissors. Cut along your measurement lines and be sure to keep to the lines! Pro Tip! If you're worried about the shorts being even, cut one side and fold the shorts over to copy the line onto the other leg. BOOM! Even lines for both legs of the shorts! 


BEHOLD! You made it through the hardest part! Now we get to move on to the fun part! Distressing the shorts! Now, I won't lie, this was something I'm COMPLETELY clueless on. Luckily, there's plenty of hacks on the internet that helped me make it through! Like this American Eagle guide to distressing I found on Pintrest!

The two methods I used in this process were the Xacto knife method and the Grater method. 


The Grater Method:
Enjoy this poorly done video! 
This is just to show the "method"...if you can call it that? Basically, gather the raw ends up in your hand, kinda layer it randomly in you hand like so...

Once you've got a good grasp on it, run the grater over it in a semi rough manner. You'll see the ends start to fray. Now, don't go overboard! Remember, with time and laundry cycles, they'll become more and more distressed. 
With grating (left) vs. raw cut (right)

The Xacto Knife Method:
This is where the required patience comes into play...
To use the Xacto method...well, it will challenge your sanity. . . 
First, pick the spot you'd like to have that classic "rip" in your jeans. For me, I placed it on the back butt pockets. The jeans are pretty short and showing enough skin for my taste, but I still wanted some rips in them. SO, for this method, you'll need to make two slits. This will make up the length of the rip you're wanting to make. 

Once you've got the slits made, use the tweezers to pull out the woven blue threads. Like I said, patience is KEY here. depending how large you made or want your rips, the longer you'll be pulling threads. . . and it's not as easy as you think! Very time consuming and irritating!!! But it's worth the end result! 


Here's what my rips turned out looking like! 


This is where I pretty much called it quits for the day! I roughed up the label and thick seams with the grater, but never went crazy anywhere. I saw somewhere that throwing them in the dryer for a couple minutes would help fray the edges up nicely, so I might try that and post an update about it...But as of now, I think they turned out pretty great! I'm looking forward to thrifting some more and finding another pair! Maybe some thicker denim?? If I could get my hands on some old school Levi's, I'd be ecstatic! I'm excited to wear these when it gets warmer! Just putting them on with my boots made me ready for music festivals! HURRY UP SUMMER!!!!! 


Are you planning on making your own cut offs? Excited for summer?! Lets start some comments down below y'all!!! :D

Saturday, January 10, 2015

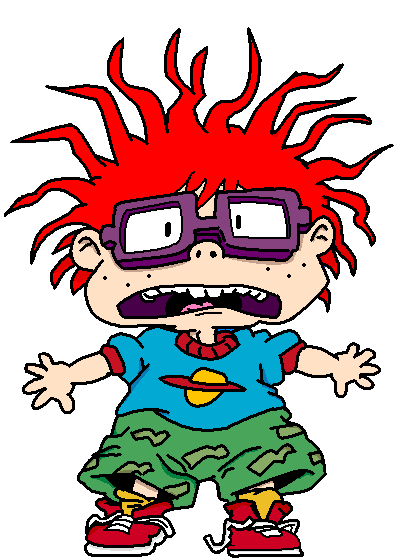
The Long Awaited Chuckie Finster Cosplay Tutorial!

Ladies and Gentlemen, BOYS AND GIRLS!!!!! It's finally here. The wait is now over!
The Chuckie Finster cosplay tutorial is COMPLETE!


For this tutorial, you will need:


  • Blue T-shirt
  • T-shirt board
  • Paint Brushes
  • White, Black, Red, and Yellow fabric paint (acrylic paint works too)
  • Fine point Sharpie
  • Some large round object for tracing
  • Reference picture of Chuckie's shirt


READY?! LETS DO THIS!!


Step One:
Place your shirt on the T-Shirt board and pin the sides down so the shirt lies taunt against the board. This is super important, so when you're painting, the shirt doesn't move and make you mess up your lines.


Step Two:
Now, you need to draw Chuckie's iconic planet. Find something 5-6 inches in diameter that you can trace around. For me, I just used my dinner of instant noodles. When you trace, make sure you're using a FINE TIP Sharpie or pencil. The planet on Chuckie's shirt is kinda sloppy and looks like a kid drew it, so we're just using this as a basic outline, to help keep it even on all sides.


As for the ring around the planet, just free-hand it. Now, that might sound a little scary, but it's easier than it sounds. REMEMBER, it's suppose to look like a child's drawing, so if you're not the most artistic person in the world, IT'S OK! Just look at the reference picture as you draw it and you'll be fine!

Step Three:
YAY FOR PAINTING! Alright guys and gals, since we're painting on a dark shirt with light colors, we need to PRIME the space. I've painted PLENTY of shirts in my time to have learned this lesson the hard way. Basically, we just need to paint the whole planet white. It'll cover up your lines, but don't panic! These lines were just a guide. As the last step, we'll outline everything again with black, to give it that extra cartoony effect!


Step Four:
Once the entire planet is primed white, we can add color. I start with lightest colors first, mainly out of habit. This part is pretty self explanatory, just paint the two colors over the white. But remember! Between each layer of paint, you need to let the paint dry, and occasionally, GENTLY, lift the shirt from the board. (The paint seeps through the cloth and when it dries, the shirt will stick to the board. To prevent that, we need to gently separate the shirt from the board from time to time).


Step Five:
The last step is to outline the planet with black paint. DON'T WORRY about trying to have a steady hand! It's OK if it looks a little wonky and wobbly. IT'S A CARTOON, it doesn't need to look perfect!

Now from here, I think I might be done...but looking at Chuckie's picture, His shirt is trimmed with red on the collar and sleeves. It's up to you on how you'd like to accomplish this! I think I might just paint the trim.

But as of now, I'm happy with how it turned out! I've got time to figure out how I want to do the trim though. Our plans for the Con in February fell through, but Aaron and I are looking into A-Kon in June for my birthday! FINGERS CROSSED that works out, because I'd LOVE to wear this in the summer rather than winter :P


SORRY FOR THE MESSY DORM ROOM!! I decided to work on this rather than unpack. TOTALLY worth it! ;D

Well, I hope this tutorial was worth the wait! I'm really excited with how it turned out!! If you've got any comments or questions, don't be afraid to leave a note down below! 

Wednesday, November 5, 2014

Rocket Raccoon Cosplay - Jumpsuit and Gun

Now that you've seen how I made Rocket's armor in the last post, here's all the other tid bits you need to know!

SO, this is the jumpsuit I ordered off of Amazon. The quality was GREAT, it just stretched out a little too much on the butt and boob area, so you could see my bra and undies...NOT CUTE. To remedy this, I found the perfect spanks to wear underneath it!
I got this at Walmart, and let me just say, it was money WELL spent. Not only did it 1) cover up the undies, and 2) keep me warm during our outdoor party, but it 3) made my figure look AMAZEBALLS. I have a feeling this thing will come in handy with future cosplays.

As for the ears and tail, I just went the simple route of buying a set from Spirit Halloween.

Of course, I didn't use the mask, I just did make up for the "raccoon eye" effect. This was the exact set I bought, but my ears didn't seem to be that pointy. All-in-all, it was another great purchase.

As for the black part on the jumpsuit, all I did was buy a plain black t-shirt about 3 sizes smaller than what I would normally wear, and cut it up. You want it super tight so it's not baggy anywhere. There's no exact pattern for how I cut the shirt, but I can tell you my process.

  • First, put on the shirt inside out.
  • Use a white crayon to trace three oblong horizontal "holes" on the torso, and trace the inside seam on the shoulder. 
    • Make sure you have at least 1.5 -2 inches between each "hole" because the fabric will sort of roll once it's cut. This will help keep it from completely rolling up on itself. 
  • Cut out the neck as close to the collar as possible!
  • Cut on the white crayon lines - AS STRAIGHT AS POSSIBLE - you won't be able to hide any jagged edges so try to be as neat as possible!
Here's how mine turned out!

Sorry for the messy counter...I'm kind of a mess. 
The length of the shirt was perfect! It covered my butt (which I'm kinda self conscious about) and hugged the jumpsuit nicely. 

Next up was the boots...
I already had a favorite pair of brown knee high boots that I wear all the time. To sort of give the effect of the brown/black fur Rocket has, I paired the brown boots with a pair of black knee high socks. (I know, BROWN AND BLACK CLASH!!! Get over it. It worked :P)

Now then...Time for the Gun:
This was actually the first thing I did for this cosplay. While I was planning and waiting for my jumpsuit to arrive, I decided it would be something good to take up my time. 

I was going to make Rocket's full sized blaster, but seeing as I was going to be wearing this cosplay to a Halloween party, I figured that his blaster would be a little cumbersome to carry around. While snooping around Walmart (yes, Walmart again...There's really nowhere to shop here in Stillwater) I found this awesome Nerf gun for like $15. I liked it because it was big and bulky. Almost like a mini version of Rocket's blaster. 


So, the steps are pretty self explanatory. I primed the whole gun white (except down the barrel, which was too hard to get to), and started with the darkest colors. From there, I added the metallic colors and details for age, wear, battle use, etc. This I actually took step-by-step pictures of! ENJOY!


It was hard to get good pictures of the close up detail, but I made the tip of the gun much darker than the rest. WHY you ask? In reference to my painting tips on the Rocket Armor post, I wanted to make the gun look like it was actually used, and burnt by "blaster fire". Because being Rocket, he LOVES to use his guns. 

Last but not least...
The Make Up!
For this, I had a basic idea of what I wanted to do, but I turned to Pinterest to see if I could find an actual picture to follow.
If anyone knows who this cosplayer is, I'd love to give her some credit!! AWESOME make up!
But alas, being in a small college town, you don't have access to really good make up. I mean, we have an Ulta, but being on a college student budget, I'd kinda rather eat than buy makeup. SO, again to Walmart I went. I bought some $1 white eyeliner by NYC (which was shockingly the ONLY white eyeliner I could find). Luckily, I remembered to bring up my Sephora box of goodies that has like 100 eye-shadows in it, and was able to concoct a fairly good formula for a smokey eye. Some black gel liner to outline the white, and I was ready to go!
PRO-TIP* - Not sure if you're aware, but I learned this from a friend who was a dancer. If you spray your face with hairspray after you've applied your makeup, it will seal it and keep it from running! Pretty cool huh?

Here's what my makeup ended up looking like!
My amazing hubby-to-be, Aaron, as Star Lord :3

Questions? Comments? Let me know! Email Kenzie!


Rocket Raccoon Cosplay - Armor

Alrighty guys and gals! This was my first "official" cosplay. I am ecstatic with how it turned out and I hope y'all feel the same!

The inspiration for this cosplay was of course the AMAZING comic and movie Guardians of the Galaxy. I always loved the comics and when I found out it was going to be a movie I was super stoked! My fiancé started it by saying he wanted to be Star Lord for Halloween. Now, some girls would automatically pick Gamora or Nebula to dress up as, because they're girls. But, me being me, I love to do something different and unexpected :3 So, after seeing the movie twice, I decided Rocket was the character most like myself, and THAT was who I needed to be.

Now then, since this is my first tutorial, if there's anything on here that I didn't explain very well, or you need some help with when you're trying it out yourself, just send me an email to the address at the bottom of my About Me page! :D


-A rough estimate of what you'll need- 
Construction paper - for pattern
Sharpie, pencil, etc.
Scissors - duh
Ruler or Yardstick
A big pack of regular thickness fun foam.
3-4 large sheets of 1/8th inch fun foam
Low temperature hot glue gun (with A LOT of glue)
Paint! (brown, black, white, maroon, silver - metallic, cobalt blue - metallic, dark bronze - metallic, gunmetal grey - metallic, and if you can find it, clear/white glow in the dark paint) 
Velcro sticker rounds

First off, like when I plan out any possible cosplay, I turned to Google. After searching and searching, no one seemed to have ANY type of tutorial I could use for pieces like Rocket's armor. THEN the clouds parted and the storms cleared when I found Commander Holly had made videos for every part of her Rocket cosplay. But, that's when the storm clouds rolled back in...though her videos are AWESOME and very thorough, there was NO WAY I could do that much heavy fabrication in my dorm room. And lord knows a college student's budget is stretched as it is, there was no way I could afford the equipment. So here's where the creative genes kick in. I looked on Pinterest,  mainly for reference pictures, and just HAPPENED to stumble upon the perfect picture of someone's foam fabricated Rocket armor.


--To be honest, I almost peed myself--
THIS is something I can work with!

My next step, was to make a sketch of the pattern. Since the picture I found was a guy's cosplay, I needed to slim down the back piece and make it a tad more feminine.


After the sketch comes the fun part. I made a pattern of each piece out of fun foam (AKA craft foam) occasionally just laying pieces on me to make sure they were the right size. I wish I could tell you exact measurements, but I kinda winged it. Just try to measure your back (or get a friend's help)

Sorry for the crappy-not-so-awesome picture. I just wanted to show the scale of the pattern.
The Foam:
So here's the dealio. I used two different types of fun foam. Just regular thin sheets and a few pieces of thicker/sturdier foam (I believe 1/8th inch thick is as thick as it gets).

On the pattern, I attempted to color code the pieces. Also! Make sure you leave quite a bit of overlap between each piece. That way, you'll have something to glue together. I left about 1-2 inches for each overlap.

Ok, so I kinda had to reassemble the pattern for this picture. It's missing the two bottom tail pieces (yellow shown above). I marked X's on the pieces I cut out of the 1/8th inch foam (including the two yellow tail pieces in the previous picture!) You'll also need a 1/8th inch thick sheet for the backing of the entire piece. Just so it's not so flimsy and flip floppy. 
As for the shoulder straps and hip straps (you're gonna hate me for this) but that was purely a happy accident. I can't remember how, but I "winged" the shoulder straps and as a result, the scraps turned into the hip straps. I know, CRAZY and kind of annoying that I can't give you an exact pattern, but if you look at some of the pictures in the Painted section, you'll be able to see what I mean and "wing" it too.

YAY CRAFTING!

Now then! Got your pieces cut out?! FANTASTIC! Now we can be like the Avengers and assemble! Hehehe. Get it? Assemble......MOVING ON...

Ok, first and foremost. You will NEED a low temperature hot glue gun. If you use a regular glue gun, it will pretty much melt right through your foam or melt it down to a not so pretty state. But if you like to live dangerously and have the foam to spare, by all means, have at it.
Gluing it all together is fairly simple. Just follow your pattern's assembly and you're sure to do it right! In the end, this is what mine looked like:

The white foam is all the thicker 1/8th inch foam and the tan is all the regular thin foam. I also glued the tail in place between two of the pieces because I knew I wouldn't be able to attach it anywhere else onto my jumpsuit.


The Paint:
This was my favorite part!! I love painting as it is, and I got to go crazy with this part! Me being me, I didn't take any progress pictures, but I feel you'll get the idea by seeing it complete.
The main things to keep in mind are:

  • Do the base colors first! If you're using colored foam, I suggest doing a white wash just so the colors you paint on will be true to the color.
  • When you distress it, make sure you're putting thought into how you're doing it. Think about it! the nooks and crannies should be corroded with dirt and grime. Rocket is a bounty hunter, he's probably been in a TON of fights and been thrown to the ground a few times. When you distress, make sure you scuff and darken places that would have hit and skidded across the ground if you were thrown across a room! Remember! It doesn't have to be even! Nothing ages or corrodes at an even rate perfectly symmetrical! 
  • It's not gonna be perfect the first go around. AND THAT'S OK! You just have to keep adding colors, messing around with tones, and light to see where the highlights and shadows hit. Painting will probably take the most time out of everything, so do it right and take your time!
  • Test out colors on scrap pieces of foam. You'll have PLENTY of scraps and that's perfect to test out different colors! Play with everything. If you see a color in the store that would look good, test it out! THERE ARE NO WRONG ANSWERS!
Use mine as an example, but distress it how YOU FEEL it should be distressed. Just remember the helpful hints and you'll do great!
On the circle in the center of the back, I used a cobalt blue and the glow in the dark paint. I WANTED to use blue LED lights, but I didn't have time :/ The glow in the dark paint worked fairly well! But it was nothing compared to an LED light. 
CONGRATULATIONS! THE HARD PART IS OVER! Well, kinda. It was the day before Halloween and I still needed something to hold the armor onto my jumpsuit. I thought about metal snaps, but after testing, I was afraid of the snaps tearing right through the fun foam. Then my mom suggested the simple idea of stick on Velcro. THANKS MOM! Seriously. These things. Like $2 at Walmart. I had to use about 1 and a half packages to keep the armor on, but it worked GREAT. All I did was stick on 3 dots on each arm and hip strap. The trick to making them line up right is put the two sides together first, then peel off one sticker and place it on the foam. After you stick all the pieces on the foam, get a friend to help hold it while you peel and stick the other dots into place on your jumpsuit. It's just that simple!


So, cool! That's how I made the armor for the Rocket Raccoon cosplay! I'll be writing another post about the jumpsuit and gun here soon! STAY TUNED!